OK, so you’ve decided that you’d start tracking your site with Google Analytics. Or you were given the task to install Google Analytics tracking on a site. In both cases you need to start by logging into a Google account (not necessarily a Gmail one), accepting the Google Analytics terms of service and then creating your first web property. After you’ve created your web property you’re ready to get your tracking code or tracking ID and get all GA setup. The last step would be to make sure your setup looks good and the data being gathered makes sense. We’ll walk you through the last two steps: getting your tracking code and ID and verifying your Google Analytics setup in this short post.
Getting your Google Analytics Tracking Code and Tracker ID
If you’re using Google Tag Manager or a ready-made plugin to install Analytics on a site, you should only need to get the tracker ID, not the the whole tracking code. If you are a developer or need to get the tracking code so your developer can embed it directly on the site, then you’d need the whole JavaScript tracking code. In both cases you’d need to follow these steps, assuming you’re already logged in to the appropriate Google account:
1. Navigate to Google Analytics: you can also click here
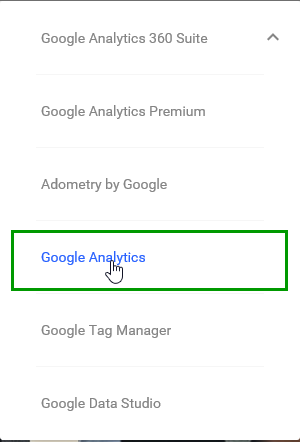
2. Click on Sign In and choose the option that says just “Google Analytics”:
3. Navigate to the “Admin” tab from the top navigation, then select the Account, then select the Property you want to get the tracking code or tracker ID for :
![]()
(click for full-sized image)
4. Click on “Tracking Code”:
![]()
On this page you have both your tracking ID (also referred to as Tracker ID, UA ID, Google Analytics ID and sometime incorrectly as “account number”) and your tracking code. At this point you’re read to add Google Analytics to your site: the code is just a JavaScript snippet that needs to be copy-pasted in your site’s code. Usually it’s placed in the <head> part of the site. If you’re using GTM or a plugin usually you’d just need to copy-paste the tracking ID.
Once the code is on the site it automatically starts gathering data about your visitors and their actions. However, how to make sure the code is placed correctly and is gathering data as expected?
Checking Your Google Analytics Setup
There are a few quick things you can do to verify that Google Analytics is gathering data after you’ve placed the code on the site – either directly, with the help of your developer, or via GTM or a plugin:
1. Navigate to the page you got the code from or refresh it, if you’re already there. Check the “Status” message. If it says “Receiving traffic…” then you’re good.
2. You might notice on the screenshot above there is a message saying “3 active users right now”, followed by a link to the real-time traffic report (your own number will be different, or it may say 0). Click that link to get a much better idea of what users are doing on your site this very moment, as tracked by Google Analytics. If your site has just launched or is very low-trafficked, then you might not see any visits there. To check, open the homepage of the site and browse a few pages. Then return to the real-time report and see if your actions are reflected there. If they are, you should see at least one active visitor and also if you go to the “Content” section of that report you should see a list of pages that you’ve just visited. You’d also want to check the “Last 30 mins” report:
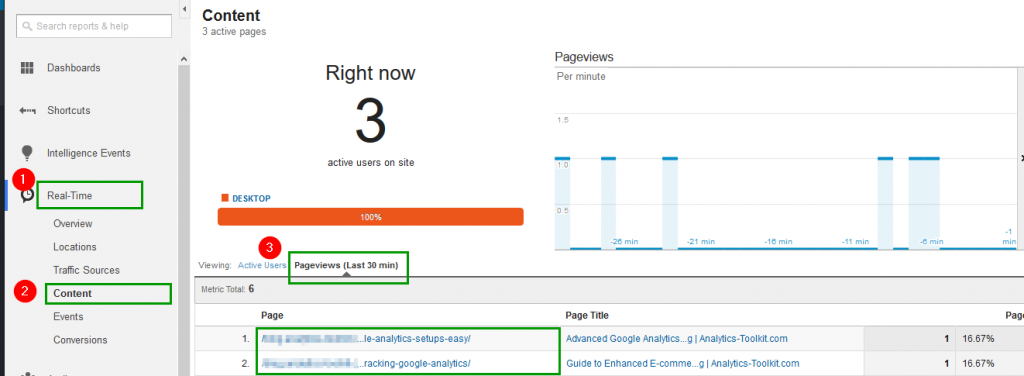
(click for full-sized image)
3. The above two steps are just to verify that you have basic tracking working. If you’re going to use Google Analytics effectively, you’d likely want to do some customization to the code, like have Enhanced E-commerce tracking, site search tracking, campaign tracking, have goals, events. etc. In any case, if you want to be able to rely on the data to make business decisions it’s best that you have the analytics data and settings audited. One of the quickest ways to do so is to use our Google Analytics Audit Tool as it does more than 30 different types of checks on the integrity and quality of your Google Analytics data in under a minute (for most websites). It’s especially useful if you work with multiple websites, e.g. in a digital agency or as a freelancer.
See this in action
Identify potential issues with your analytics setup.
I hope people new to analytics enjoyed this quick guide and I can promise our more advanced readers that we have interesting stuff in the pipeline!
About the author

Managing owner of Web Focus and creator of Analytics-toolkit.com, Georgi has over twenty years of experience in online marketing, web analytics, statistics, and design of business experiments for hundreds of websites.
He is the author of the book "Statistical Methods in Online A/B Testing", of white papers on statistical analysis of A/B tests, and has been a speaker at conferences, seminars, and courses. Georgi has been distinguished as a winner in the Data & Analytics category of the 2024 Experimentation Thought Leadership Awards.
